 |
|
|
|
Grades/Level: High School (9–12)
Subjects: Visual Arts, Science
Time Required: 3–5–Part Lesson
1–3 class periods
Author: J. Paul Getty Museum Education Staff
Permissions: 
The lesson plan and downloadable materials on this page are licensed under a Creative Commons Attribution 4.0 International License. |
|
|
|
|
|
|
|
|
|
Lesson Overview |
|
Students create and use pinhole cameras to understand how artists use and manipulate light to capture images in photographs. They shoot and develop photographs made with pinhole cameras. They compare and contrast a nineteenth-century image, photographs taken with a pinhole camera, and pictures created with a digital camera or camera phone.
|
|
|
|
|
|
Learning Objectives |
|
Students will:
• Understand that light travels in a straight path and can be refracted with a convex lens.
• Understand that light-sensitive chemical processes can be used to create images using light as a catalyst.
• Identify characteristics of light waves and make predictions about how light can be manipulated to affect a photograph.
• Create and develop photographs using a pinhole camera.
• Compare and contrast photographs made with different types of cameras.
|
|
|
|
|
|
|
|
|
|
Materials |
|
• Materials listed in the beginning-level lesson
• Small magnifying glasses
• Oatmeal canister lids
• Black paint and paintbrushes
• Black electrical tape
• Photosensitive paper purchased at a camera supply store
• Flat objects to use as stable supports for cameras
• Examples of contemporary photographs of buildings (from books, magazines, online, or taken by the teacher with a camera, digital camera, or camera phone)
• Stationary objects like vases, books, or items from around the classroom
• (Optional) Digital camera or camera phone
• Reproductions of photographs printed on metal, glass, and paper:
Metal: John Plumbe, Jr., The United States Capitol, 1846, daguerreotype.
Glass: Attributed to Henry Hollister, Couple at Niagara Falls in Waterproofs, 1860s, ambrotype.
Paper: William Henry Fox Talbot, View of the Boulevards of Paris, 1843, salt print.
• (Optional) Video: Photography: The Wet Collodion Process
• (Optional) Video: Early Photography: Making Daguerreotypes
|
|
|
|
|
|
|
|
|
|
|
|
|
Lesson Steps |
|
1. Complete steps 1–2 of the beginning-level lesson and steps 2–6 of the intermediate-level lesson, adapting for grade level as appropriate.
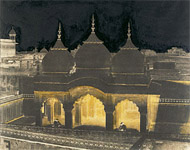
2. Students will use their pinhole cameras to photograph their school building or important buildings in their neighborhood, just as Dr. John Murray photographed the mosque. Point out that Murray created several pictures in India to document the architecture there.
Camera Preparation
• Students should cover the pinhole with a piece of black electrical tape.
• They should remove the paper sleeve and waxed paper from the camera.
• Hand out canister lids.
• Have students paint the lids of the canisters with black paint.
• Set aside to dry.
• Students should gather two flat objects to place on each side of their cameras to keep them from rolling.
Paper Preparation
• Students will be given photosensitive paper to insert into their cameras, but first they should practice with regular paper that has been marked with a B on one side to indicate the blue side of photosensitive paper.
• Distribute regular paper marked with a B on one side. Tell students to place the side with the B against the top of the canister, and then cover the back with the lid.
• Once students can demonstrate that they can accomplish the task quickly, dim the lights in the room and distribute the photosensitive paper in its package.
• Give students about half a minute to insert the photosensitive paper in their cameras and cover with the lid. Distribute masking tape to secure the lid in place.
Exposure and Developing
• Students will walk around their school or buildings of their choice to select their compositions. (Optional: students can use digital cameras or camera phones to test out different compositions and angles.)
• Once they find their favorite compositions, students will put down their pinhole cameras and secure them on each side with flat objects. Students will then remove the tape from the pinhole for five minutes, replacing it when the time is up.
• Students should take their cameras to a sink and fill the sink with cold water. They will quickly remove the lid and paper from the camera and submerge the paper in the cold water for about four minutes. Remove the wet paper and allow it to dry. Students will have negative images of their subjects.
3. Students share with partners the photographs they took of buildings. Each pair should compare their negatives to contemporary photographs of buildings or to pictures shot with their digital cameras or camera phones. Have them discuss the following:
• What are the differences between the images?
• What are the things you like and dislike about the different types of photographs?
• Which types of surfaces on the buildings created specific tones or colors in the negatives?
Pairs should chart their comparisons and share their findings with the class.
4. Display the reproduction of the photograph by Dr. John Murray. Discuss how that negative is similar to or different from the students' photographs. Ask students to identify which areas of the mosque might have had reflective or dull surfaces, based on their observations of their own negative photographs.
5. Students will use their observations from steps 2 and 3 as the basis for experimenting with taking photos of two objects that have reflective and dull surfaces. Repeat the exposure process in step 2 with the objects. Hand out journals and have students record results.
6. Students will then take photographs using a lens with their pinhole cameras. Have students mount small magnifying glasses to their cameras with tape. Students should hypothesize about how the lens will affect their photographs, based on their knowledge of the characteristics of light waves. Repeat the exposure process in step 2. Have students record their hypotheses, observations, and findings in their journals.
7. Students can also experiment by placing an object inside the canister in front of the paper. After they expose the object and paper, they will see a silhouette of the object on the paper. Areas around the object will be fuzzy. Explain to students that the fuzzy areas were created as light waves were obstructed by and diffracted around the object.
|
|
 |
|
| Emperor's Mosque, Sr. John Murray, 1857–1860 |
|
|
|
|
|
|
|
|
|
Standards Addressed |
|
Common Core Standards for English Language Arts
Grades 6–12
SPEAKING AND LISTENING
Comprehension and Collaboration
1. Prepare for and participate effectively in a range of conversations and collaborations with diverse partners, building on others' ideas and expressing their own clearly and persuasively.
2. Integrate and evaluate information presented in diverse media and formats, including visually, quantitatively, and orally.
For more national and California state standards for this curriculum, refer to the charts found in the links at the top right of this page.
|
|
|
|
|
|

