 |
|
|
|
Grades/Level: Middle School (6–8)
Subjects: Visual Arts, Science
Time Required: 3–5–Part Lesson
1–3 class periods
Author: J. Paul Getty Museum Education Staff
Permissions: 
The lesson plan and downloadable materials on this page are licensed under a Creative Commons Attribution 4.0 International License. |
|
|
|
|
|
|
|
|
|
Lesson Overview |
|
Students create pinhole cameras to learn how artists manipulate light to make photographs. They describe and analyze a nineteenth-century photograph and use their cameras to capture the architecture of their school or other buildings.
|
|
|
|
|
|
Learning Objectives |
|
Students will:
• Understand that light travels in a straight path.
• Understand that the process of making photographs has changed over time.
• Draw a building by using the pinhole camera as a tracing tool.
• Understand that light can be refracted by a convex lens to focus a camera.
|
|
|
|
|
|
|
|
|
|
Materials |
|
• Materials listed in the beginning-level lesson
• Student handout: Light Waves and Lenses
• Small magnifying glasses
• Reproductions of photographs printed on metal, glass, and paper:
Metal:
John Plumbe, Jr., The United States Capitol, 1846, daguerreotype.
Glass:
Attributed to Henry Hollister, Couple at Niagara Falls in Waterproofs, 1860s, ambrotype.
Paper:
William Henry Fox Talbot, View of the Boulevards of Paris, 1843, salt print.
• (Optional) Video: Photography: The Wet Collodion Process
• (Optional) Video: Early Photography: Making Daguerreotypes
|
|
|
|
|
|
|
|
|
|
|
|
|
Lesson Steps |
|
1. Complete steps 1–2 of the beginning-level lesson.
2. Look at early photographs such as cyanotypes, ambrotypes, and salted-paper prints. Show photographs printed on metal, glass, and paper (see Materials list). Discuss how a camera was used to expose either glass, metal, or paper coated with photosensitive chemicals to create images.
3. Compare how images look on different materials. The images on metal and glass are sharper than the image on paper, which is slightly blurred, with less detail visible. You may have students watch the videos Photography: The Wet Collodion Process and Early Photography: Making Daguerreotypes to help students understand the complexity of early photographic processes. Explain that technological advances have made it easier for us to use cameras and to make negatives and prints.
4. Tell students they will be creating simple pinhole cameras. Point out that the basic function of a pinhole camera is similar to that of the camera used in the Making Daguerreotypes video. Complete steps 3–5 of the beginning-level lesson.
5. Hand out small magnifying glasses. Have students place the magnifying glasses in front of the pinholes on their cameras and look at the images on the waxed paper. Ask students to compare how their images look with and without the magnifying glasses.
6. Explain that the magnifying glass functions as a convex lens. When light passes through the lens, the light is refracted (bent) by the curved glass. This forces the light waves to move closer together as they pass through the pinhole. This function of a lens allows photographers to focus on objects from a variety of distances. When passing through a convex lens, the light waves are bent toward the optical center of the lens, causing them to converge on the focal point in front of the lens. The relative position of the object with respect to the focal point of the lens determines how the object is imaged. If the object is beyond twice the length of the focal point, then it appears smaller and inverted (see Illustration 1 on the Light Waves and Lenses handout). If the object is closer to the lens than the focal point, the image appears larger and upright (see Illustration 2 on the handout).
7. Tell students they will be using their pinhole cameras to create sketches. Complete steps 6–8 of the beginning-level lesson, or adapt the lesson by having students select and sketch an important building in their neighborhood.
|
|
 |
|
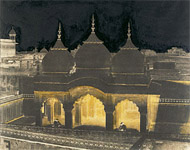
| Emperor's Mosque, Sr. John Murray, 1857–1860 |
|
|
|
|
|
|
|
|
|
Standards Addressed |
|
Common Core Standards for English Language Arts
Grades 6–12
SPEAKING AND LISTENING
Comprehension and Collaboration
1. Prepare for and participate effectively in a range of conversations and collaborations with diverse partners, building on others' ideas and expressing their own clearly and persuasively.
2. Integrate and evaluate information presented in diverse media and formats, including visually, quantitatively, and orally.
For more national and California state standards for this curriculum, refer to the charts found in the links at the top right of this page. |
|
|
|
|
|

